Thursday, 11 May 2017

Mount Volume On Docker Container

As per the official documentation, there are 2 ways in which you can manage data in Docker:
  • Data volumes
  • Data volume containers
Let us work through examples for both the above cases.

Few points to keep in mind about Data Volumes

  • A data volume is a specially designed directory in the container.
  • It is initialized when the container is created. By default, it is not deleted when the container is stopped. It is not even garbage collected when there is no container referencing the volume.
  • The data volumes are independently updated. Data volumes can be shared across containers too. They could be mounted in read-only mode too.

Mounting a Data volume

Let us begin first with the most basic operation i.e. mounting a data volume in one of our containers. We will be working with the busybox image to keep things simple.
We are going to use the -v [/VolumeName] as an option to mount a volume for our container. Let us launch a container as given below:
docker@boot2docker:~$ docker run -it -v /data --name container1 busybox
This will launch a container (named container1) in interactive mode and you will be at the prompt in the container.
Give the ls command as shown below:
docker@boot2docker:~$ docker run -it -v /data --name container1 busybox
/ # ls
bin dev home lib64 media opt root sbin tmp var
data etc lib linuxrc mnt proc run sys usr
/ #
Notice that a volume named data is visible now.
Let us a do a cd inside the data volume and create a file named file1.txt as shown below:
/ # cd data
/data # touch file1.txt
/data # ls
file1.txt
/data #
So what we have done so far is to mount a volume /data in the container. We navigated to that directory (/data) and then created a file in it.
Now, let us exit the container by typing exit and going back to the boot2docker prompt.
/data # exit
docker@boot2docker:~$
Now, if we do a docker ps -a , we should see our container (container1) currently in the exited state as shown below:
CONTAINER ID IMAGE COMMAND CREATED STATUS PORTS NAMES
22ab6644ea6b busybox "/bin/sh" 3 minutes ago Exited (0) 23 seconds ago container1
Now, let us inspect the container and see what Docker did when we started this container.
Give the following command:
docker@boot2docker:~$ docker inspect container1
This will give out a JSON output and you should look for Volumes attribute in the output. A sample output from my machine is shown below:
"Volumes": {
 "/data": "/mnt/sda1/var/lib/docker/volumes/af0e7c1547fbcb42e8d5a514252e47cb754c8adf701e21b13b67a640d7a77883/_data"
 },
 "VolumesRW": {
 "/data": true
 },
This tells you that when you mounted a volume (/data), it has created a folder /mnt/sda/…. for you, which is where it puts all the files, etc that you would have created in that volume. Note that we had created a file1.txt over there (we will come to that in a while).
Also notice that the VolumesRW mode is set to true i.e. Read and Write.
Since we are currently in the boot2docker host, we can check the contents of the folder by giving the command (Note that you will have to paste what you see on your machine)
docker@boot2docker:~$ sudo ls /mnt/sda1/var/lib/docker/volumes/af0e7c1547fbcb42e8d5a514252e47cb754c8adf701e21b13b67a
640d7a77883/_data
file1.txt
docker@boot2docker:~$
You will see that it shows our file1.txt that we created.
Now that the container is stopped i.e. exited, let us restart the container (container1) and see if our volume is still available and that file1.txt exists.
docker@boot2docker:~$ docker restart container1
container1
docker@boot2docker:~$ docker attach container1
/ # ls
bin dev home lib64 media opt root sbin tmp var
data etc lib linuxrc mnt proc run sys usr
/ # cd data
/data # ls
file1.txt
/data #
The sequence of steps above are as follows:
  1. We restarted the container (container1)
  2. We attached to the running container (container1)
  3. We did a ls and found that our volume /data is still there.
  4. We did a cd into the /data volume and did a ls there. And our file is still present.
Hopefully this explains to you how you can persist your data in volumes.
Now, let’s do an interesting thing. Exit the container and remove the container.
/data # exit
docker@boot2docker:~$ docker rm container1
container1
docker@boot2docker:~$ sudo ls /mnt/sda1/var/lib/docker/volumes/af0e7c1547fbcb42e8d5a514252e47cb754c8adf701e21b13b67a
640d7a77883/_data
file1.txt
docker@boot2docker:~$
This shows to you that though you have removed the container1, the data volume is still present on the host. This is a dangling or ghost volume and could remain there on your machine consuming space. Do remember to clean up if you want. Alternatively, there is also a -v option while removing the container as shown in the help:
docker@boot2docker:~$ docker rm --help
Usage: docker rm [OPTIONS] CONTAINER [CONTAINER...]
Remove one or more containers
-f, --force=false Force the removal of a running container (uses SIGKILL)
 --help=false Print usage
 -l, --link=false Remove the specified link
 -v, --volumes=false Remove the volumes associated with the container
This will always remove your volumes when the container is also removed.
Exercise: What happens if you launch another container with the same /data volume. Is the file still there or does each container get its own file system? Try it out.

Mounting a Host Directory as a Data volume

Now that we have seen how to mount a volume in the container, the next step is to look at the same process of mounting a volume but this time we will mount an existing host folder in the Docker container. This is an interesting concept and is very useful if you are looking to do some development where you regularly modify a file in a folder outside and expect the container to take note or even sharing the volumes across different containers.
Since we have been using boot2docker for our examples so far, it is important to understand what the host means over here. In fact, the host over here is the boot2docker VM and not your laptop or machine. However, since boot2docker is a Linux VM running in VirtualBox, we do have the luxury of having some folders from our machine being available and mapped as host folders.
To understand that, do the following :
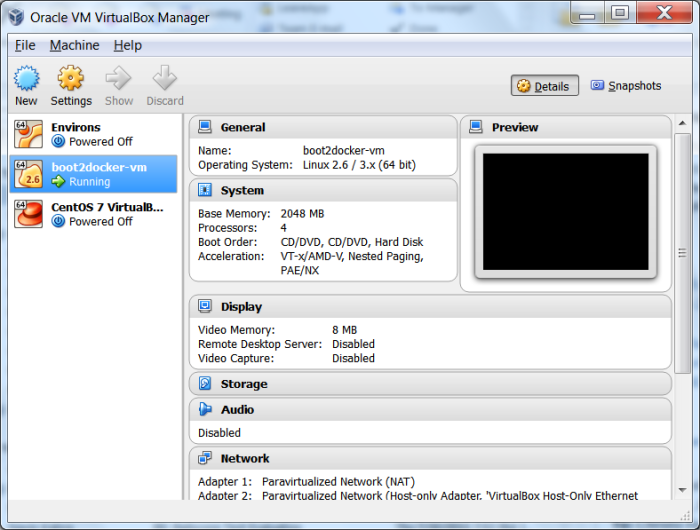
  • Launch Oracle VM VirtualBox on your machine.
  • You will be able to see the boot2docker-vm in VirtualBox as shown below:
vbox1
  • Right click on the boot2docker-vm and click on Settings. This will bring up the Settings dialog and you can click on Shared Folders. You will notice that C:\Users folder has been shared as C/Users in your host i.e. boot2docker. You can map additional folders if you want but we will go with this example.
To mount a host volume while launching a Docker container, we have to use the following format for volume -v :
-v HostFolder:ContainerVolumeName
So, let us start a busybox container as shown below:
docker@boot2docker:~$ docker run -it --name container1 -v /c/Users:/datavol busybox
/ #
What we have done here is that we have mapped the host folder /c/Users to a volume /datavol that will be mounted inside our container (container1).
Now, if we do a ls , we can see that the /datavol has been mounted. Do a cd into that folder and a ls, and you should be able to see the folder contents of C:\Users on your machine.
/ # cd datavol
/datavol # ls
All Users Default Default User Public admin desktop.ini hello.txt irani_r
/datavol #
Hope this makes it clear on how to use host folders.
Exercise:
  1. Try adding a file directly from your laptop/machine in C:\Users folder and then go back to your running container and do a ls there. You should be able to see that new file there.
  2. From the container shell, go to the /datavol folder and then add a file there. Then go back to your machine/laptop and do a dir. You should see the new files there.
Note: that the above instructions are for Windows users. If you are doing this on a Linux box, you can directly map your host folders (full path) to the container data volume.
Additional Note: Optionally if you require, you can mount a single host file too as a data volume.
Start thinking now of how you would use host folders that have been mounted as data volumes. Assume you are doing development and have the Apache Web Server or any other Web Server running in the container. You could have started the container and mounted a host director that the Web Server can use. Now on your host machine, you could make changes using your tools and those would then get reflected directly into your Docker container.

Data volume containers

We now come to the next part i.e. creating a Data volume container. This is very useful if you want to share data between containers or you want to use the data from non-persistent containers. The process is really two step:
  1. You first create a Data volume container
  2. Create another container and mount the volume from the container created in Step 1.
Let us see that in action:
We will first create a container (container1) and mount a volume inside of that:
docker@boot2docker:~$ docker run -it -v /data --name container1 busybox
Now, let us go into the /data volume and create two dummy files in it as shown below:
/ # cd data
/data # ls
/data # touch file1.txt
/data # touch file2.txt
/data #
Now press Ctrl-P-Q to come back to the boot2docker prompt without exiting the container.
Now, if we do a docker ps, we should see our running container:
docker@boot2docker:~$ docker ps
CONTAINER ID IMAGE COMMAND CREATED STATUS PORTS
006f7ba16783 busybox "/bin/sh" 27 seconds ago Up 26 seconds
Now, if we execute a command on the running container1 i.e. see the contents of our /data volume, you can see that the two files are present.
docker@boot2docker:~$  docker exec container1 ls /data
file1.txt
file2.txt
Great ! Now, let us launch another container (container2) but it will mount the data volume from container1 as given below:
docker@boot2docker:~$ docker run -it --volumes-from container1 --name container2 busybox
Notice above that we have launched it in interactive mode and have used a new parameters — volumes-from <containername> that we have specified. This tells container2 to mount the volumes that container1 mounted.
Now, if we do a ls, we can see that the data folder is present and if we do a ls inside of that, we can see our two files: file1.txt and file2.txt
/ # ls
bin dev home lib64 media opt root sbin tmp var
data etc lib linuxrc mnt proc run sys usr
/ # cd data
/data # ls
file1.txt file2.txt
/data #
You can launch multiple containers too , all using the same data volume from container1. For e.g.
docker@boot2docker:~$ docker run -it --volumes-from container1 --name container3 busybox
docker@boot2docker:~$ docker run -it --volumes-from container1 --name container4 busybox

Sharing files with host machine

Mac

The ability to share volumes with Mac hosts is built into Docker >= 1.3. Just link any volume (under /Users/) as you would on Linux:
docker run -v /Users/bob/myapp/src:/src [...]
Still need to test if this requires any special handling of permissions.

Windows

boot2docker provides two current workarounds for sharing directories on Windows, though more native sharing might follow. The official instructions are here but are more complicated than our preferred method of using the -v flag, which you can do like so:
docker run -d -p 8787:8787 -v /c/Users/foobar:/home/rstudio/foobar rocker/rstudio
In this case, /c/Users/foobar corresponds to an existing folder on your computer at C:/Users/foobar, and foobar can be anything. You can now connect to RStudio at http://192.168.59.103:8787 and log in with rstudio/rstusio. With this -v method you can read and write files both ways between Windows and RStudio.
The above approach may not always work, as described in this bug report. The workaround is to either use a double slash or $(pwd):
docker run -d -p 8787:8787 -v //c/Users/foobar:/home/rstudio/foobar rocker/rstudio
or
docker run -d -p 8787:8787 -v /$(pwd):/home/rstudio/foobar rocker/rstudio

Linux

As docker runs natively on Linux, you can always link any volume to the container with the -v or --volume flag, as described in the docker documentation. Note that this overwrites anything on the container that already exists in the target location, and will create the necessary directories if they do not already exist. We recommend running as a non-root user and linking to a subdirectory in the that user's home directory as shown below.

Avoiding permission changes when sharing volumes

By default, our docker containers run as the root user. (See managing users in docker for details.) Files created or modified by the container will thus become owned by the root user, even after quitting the container. To avoid this problem, it is necessary to run the container using a non-root user.
RStudio-server logins require a non-root user whether or not the container is sharing any volumes with the host. A default user is created automatically when these containers are run with the default command. When sharing volumes with the host, it may be necessary to make sure that the UID of the user created (whether the it is the default user, rstudio or a custom username) matches the UID of the host user (the username is irrelevant, only the UID must match). If your host machine has only one non-root user, chances are this is already fine, though you can still set the UID explicitly as described below.
Anyone running our containers as a non-root user can link a directory, including ones at or above ~/, to the corresponding user's directory on the container. The container will only ever have one user.
If the host machine user has a UID other than 1000 (or 0, for root), the user should specify their UID when running docker, e.g.
docker run -d -P -v $(pwd):/home/$USER/foo -e USERID=$UID rocker/rstudio
to avoid changing the permissions in the linked volume on the host. This is designed for rstudio-based logins and runs only when the container is executed without a default command. (Note, optionally a custom user name can be given with the environmental variable argument e USER=someuser, instead of the default rstudio user, but this is purely an aesthetic change. For matching permissions, merely ensure the UID is consistent.

Interactive containers

For interactive containers, it is sufficient to run with the flag --user docker, e.g. the interactive R container:
docker run --rm -it --user docker -v $(pwd):/home/docker/foo -w /home/docker/foo rocker/r-base R
note this command links the current working directory to /home/docker/foo on the container, where our user docker can write to, and also sets this as the working directory for the container. This is analogous to just running R in the working directory.
The only limitation is that the interactive method doesn't handle alternate UIDs. If the user running docker has a different UID, they have to do this more manually. Run a terminal in docker (using rstudio image or above):
docker run --rm -it -v $(pwd):/home/$USER/foo \
-e USER=$USER  -e USERID=$UID rocker/rstudio bash
and then in the bash shell run:
userconf.sh
su $USER
R

Deploy war file to docker image

Deploy war file to docker image

This tutorial demonstrate how to deploy a war file into docker image.
I’ll be using 2 approach:
  1. Embedded war file to build into docker image.
  2. Externalize war file by mounting with docker tomcat path.

Structure

Screen Shot 2015-10-07 at 12.56.08 AM

Approach 1

Let’s get started.
Step 1) Prepare a Dockerfile
Step 2) Run build custom image base on docker hub tomcat image
Step 3) Start docker containers

Dockerfile

  1. Prepare a Dockerfile with the following content.
  2. Copy the war file from out from the target folder.
# Pull base image
From tomcat:8-jre8

# Maintainer
MAINTAINER "xxx <xxx@gmail.com">

# Copy to images tomcat path
ADD dockerwar.war /usr/local/tomcat/webapps/

Build docker image

Now run the follow command to docker image name webserver with your Dockerfile  in current directory. First time to build docker image will require download and may take longer times.
docker build -t webserver .
docker-build-1

Run docker container

Run docker container with interactive mode.
docker run -it --rm -p 8080:8080 --name dockerwar webserver
docker-build-2

Test your container

Open a browser with URL http://192.168.59.103:8080/dockerwar/

Approach 2

Approach 2 are slightly different, let’s modified the Dockerfile, we just extends the tomcat based image.

Dockerfile

# Pull base image
From tomcat:8-jre8

# Maintainer
MAINTAINER "xxx <xxx@gmail.com">

Build docker file

docker build -t webserver .

Eclipse classpath

In this example, I’m using eclipse classpath “target” folder to mount with docker container’s /webapps/ directory.
 

Delete all files in “target folder”

Before you start the container run “mvn clean package” to your project.
 

Run docker

Run the following command in interactive mode, mount your eclipse build path to your docker container tomcat webapps folder.
 
docker run -it --rm -p 8080:8080 -v /Users/mingch/workspace/dockerwar/target:/usr/local/tomcat/webapps/ --name dockerwar webserver

Test your container

Open a browser with URL http://192.168.59.103:8080/dockerwar/
 

Tails container logs

You can either start your container without interactive mode -it or run another terminal to interact with your container. Eg, my container instance is e6b2.
To list all the log files:
docker exec -it e6b2 ls /usr/local/tomcat/logs/

To tail the log file:
docker exec -it e6b2 tail -f /usr/local/tomcat/logs/localhost_access_log.2015-10-07.txt

Wednesday, 3 May 2017

The Easy Way To Deploy Java Tomcat With Docker

If you are trying to deploy a Java Tomcat app on a Docker system, you might find other tutorials which will take you hours of heartache to get just right. How about deploying a full custom Tomcat app in just 30 seconds?

See For Yourself

Don't believe me? Just try these 10 simple steps:
$ brew install maven boot2docker # on OS X
$ boot2docker init ; boot2docker up # on OS X
$ sudo gem install bundler highline building

$ git clone https://github.com/jesperfj/webapp-with-jndi
$ cd webapp-with-jndi
$ mvn package
$ cd target/my-webapp
$ building -b http://github.com/jesperfj/buildpack-tomcat.git myapp
create Dockerfile
building docker build -t hhvm-app:latest .
hint: To run your app, try: docker run -d -p 8080 -e "PORT=8080" myapp
hint To re-build your app, try: docker build -t myapp .
$ JAVA_APP_ID=$(docker run -d -p 8080 -e "PORT=8080" myapp)
$ curl `docker port $JAVA_APP_ID 8080`/hello Hello World
The basic Heroku Java buildpack doesn't work with every Java app. If you run it from the jesperfj/webapp-with-jndi base directory it will fail. But if you use the jesperfj/buildpack-tomcat custom buildpack within the app's directory, everything works smoothly.

Conclusion

This is just a simple example of how much better the developer tooling around Docker has become over the last year. With Docker 1.0 just around the corner, there has never been a better time to start incorporating it into your daily workflow. If you are ready to get your feet wet with CoreOS, try our Building Your First App on CoreOS tutorial.

Deploying Java applications with Docker

Deploying Java applications with Docker
Docker allows you to create containers from your applications, for more information see: https://www.docker.io/. Docker can be used for many things, one of the options is to replace virtual machines with Docker containers. This article will explain how Docker can be used to setup Tomcat and deploy a Java application.

Why Docker?

Of course there are many tools available to automate the installation of servers and applications. Virtual machines can be used together with tools like Vagrant, Chef, Puppet and many more. But most of them  have their own DSL and some are not for free. That makes it harder to use them as developers and operations are unfamiliar with the tools and DSL’s. Docker has some specific commands, but for the installation of applications like the JDK or Tomcat standard OS commands can be used like apt-get, wget etcetera. Also Docker containers require less resources and startup faster than virtual images as this article will show.
Docker can be used to setup Java application servers for instance test and production machines (although for production it is better to wait until release 1). It is also possible to create a build environment with Jenkins, Nexus, Git, Sonar etc. One container should be used for every application to separate concerns.
The advantages of Docker are quite useful to overcome some of the technical challenges of continuous delivery. Versioning of Docker configuration files is quite easy. Another advantage is that environments can be setup from scratch for every deployment because Docker containers are quickly created and started.

Installing Docker

It is quite easy to install Docker. Instructions can be found on https://docs.docker.io/en/latest/installation. For this article Ubuntu 13.10 was chosen and the commands to install Docker are shown below.
sudo apt-get update
sudo apt-get install linux-image-extra-`uname -r`
sudo apt-key adv --keyserver keyserver.ubuntu.com --recv-keys 36A1D7869245C8950F966E92D8576A8BA88D21E9
sudo sh -c "echo deb http://get.docker.io/ubuntu docker main > /etc/apt/sources.list.d/docker.list"
sudo apt-get update
sudo apt-get install lxc-docker
sudo docker run -i -t ubuntu /bin/bash
The last step will start a Docker container based on Ubuntu and start bash.

Adding your user to the Docker group

Root access is necessary to work with Docker, but you can also add your user to the docker group. After adding yourself to that group you no longer have to use the ‘sudo’ command.
sudo groupadd docker
sudo gpasswd -a your_username docker
sudo service docker restart
It is necessary to logout and login, restart Ubuntu or enter the command ‘newgrp docker’ before this works correctly.

Create a Docker container with Java and Tomcat

Create a file called ‘Dockerfile’ and add the content below. This is the configuration to install Java and Tomcat on a Ubuntu Saucy (13.10) Docker container that is provided by Docker. There are a lot of official and user supplied container configurations available at https://index.docker.io/. These containers can be used as the basis for your own container.
Dockerfile content:
FROM ubuntu:saucy
# Update Ubuntu
RUN apt-get update && apt-get -y upgrade
# Add oracle java 7 repository
RUN apt-get -y install software-properties-common
RUN add-apt-repository ppa:webupd8team/java
RUN apt-get -y update
# Accept the Oracle Java license
RUN echo "oracle-java7-installer shared/accepted-oracle-license-v1-1 boolean true" | debconf-set-selections
# Install Oracle Java
RUN apt-get -y install oracle-java7-installer
# Install tomcat
RUN apt-get -y install tomcat7
RUN echo "JAVA_HOME=/usr/lib/jvm/java-7-oracle" >> /etc/default/tomcat7
EXPOSE 8080
# Download Slashdot homepage
RUN mkdir /var/lib/tomcat7/webapps/slashdot
RUN wget http://www.slashdot.org -P /var/lib/tomcat7/webapps/slashdot
# Start Tomcat, after starting Tomcat the container will stop. So use a 'trick' to keep it running.
CMD service tomcat7 start && tail -f /var/lib/tomcat7/logs/catalina.out
Build the container using: ‘docker build –t tomcat7 .’. Do not forget to use the ‘.’ at the end. Instead of ‘tomcat7’ you can pick another name if you want. Now start the container using ‘docker run -p 8080:8080 -d tomcat7’. This command makes sure that port 8080 of the container is forwarded to your local port 8080.  After a few seconds the Slashdot page should be available at http://localhost:8080/slashdot/.

Container startup speed

A small test was executed to see how fast the container actually started. This test starts the Docker container and uses ‘wget’ to retrieve a page from within the container.
The commands are placed in a file called ‘dockerSpeed’, the content of the file is shown below:
docker run -p 8080:8080 -d tomcat7
wget localhost:8080/slashdot
The ‘time’ command can be used to see how fast the commands above are executed. Executing ‘time sh dockerSpeed’ gave the following result:
real        0m4.367s
user        0m0.011s
sys         0m0.008s
A few of these tests showed that the execution times were always between 4 and 5 seconds. That’s really quick if you compare that to starting virtual machines.

Container size

Docker creates a container for every command in the Dockerfile. If you have 12 commands in the Dockerfile, then Docker will create 12 containers. This allows the user to select an older container, for instance if you only need a container with Java, you could use that container instead of the one including Tomcat. Luckily only the difference between the containers is stored, which saves quite some diskspace.
Where Docker really wins from virtual machines is if you use multiple containers with the same base. For instance if you have 8 containers each using Ubuntu and Java. You could make a base container with Ubuntu and Java and create containers based on that base image. That way Ubuntu and Java are stored only once in a container, this results in fewer diskspace being used. With virtual machines, you would need that diskspace 8 times as it is not possible to create a common base.
This results in another good point of Docker. Separation of concerns is quite important and can be achieved easily, every application can be deployed in a separate container. So for a buildserver, you could make separate containers for Nexus, Jenkins, Git etcetera.
There are a few options to view the containers. The docker ‘ps’ command shows all active containers. Adding ‘-a’ to the ‘ps’ command also shows the stopped containers. Adding ‘-s’ to the ‘ps’ command shows the size of the containers. The output below from the ‘tomcat7’ container that was created in this article shows that most containers are quite small. Only the containers where bigger things are added like the JDK result in larger containers.
$ docker ps -a -s
CONTAINER ID        IMAGE               COMMAND                CREATED             STATUS              PORTS                    NAMES                    SIZE
3d9bd89b5ace        tomcat7:latest      /bin/sh -c service t   10 seconds ago      Up 10 seconds       0.0.0.0:8080->8080/tcp   grave_hawking            51.64 kB
fc116050d899        1ed13b7f9eb1        /bin/sh -c #(nop) CM   15 minutes ago      Exit 0                                       drunk_babbage            0 B
b788f8373ae7        5eb0489aed66        /bin/sh -c wget http   15 minutes ago      Exit 0                                       sleepy_nobel             4.613 kB
f465ff7c6cdf        a8febaa9ed55        /bin/sh -c wget http   15 minutes ago      Exit 0                                       hungry_lumiere           121.3 kB
d4dee2fd7c2f        1938691cd911        /bin/sh -c mkdir /va   15 minutes ago      Exit 0                                       dreamy_euclid            7 B
56f8bff7cfb9        d2e740750084        /bin/sh -c #(nop) EX   15 minutes ago      Exit 0                                       goofy_turing             0 B
1f8639f1841f        52d8cf48f2f3        /bin/sh -c echo "JAV   15 minutes ago      Exit 0                                       grave_bohr               2.074 kB
4cffeada2f59        8811557c9b1b        /bin/sh -c apt-get -   15 minutes ago      Exit 0                                       determined_ptolemy       11 MB
e6a24a05efb3        7d4e8d307140        /bin/sh -c apt-get -   16 minutes ago      Exit 0                                       nostalgic_wozniak        450 MB
090b2652f31e        9f35a5c15127        /bin/sh -c echo "ora   16 minutes ago      Exit 0                                       condescending_brattain   2.764 MB
743d10527376        cce7c0072447        /bin/sh -c apt-get -   16 minutes ago      Exit 0                                       sleepy_ritchie           179 kB
9da7cf4f4ca7        cea346235f02        /bin/sh -c add-apt-r   16 minutes ago      Exit 0                                       jovial_engelbart         863 B
d8c359bdd163        0dcc4e24ae2f        /bin/sh -c apt-get -   17 minutes ago      Exit 0                                       jolly_albattani          33.06 MB
7b184e8b6ece        ubuntu:13.10        /bin/sh -c apt-get u   17 minutes ago      Exit 0                                       trusting_shockley        25.18 MB
Another option is to view the images tree from Docker, the output for the ‘tomcat7’ container is shown below.
$ docker images -tree
??511136ea3c5a Virtual Size: 0 B
??1c7f181e78b9 Virtual Size: 0 B
??9f676bd305a4 Virtual Size: 178 MB Tags: ubuntu:13.10, ubuntu:saucy
??0dcc4e24ae2f Virtual Size: 215.6 MB
??cea346235f02 Virtual Size: 249 MB
??cce7c0072447 Virtual Size: 249 MB
??9f35a5c15127 Virtual Size: 249.2 MB
??7d4e8d307140 Virtual Size: 251.9 MB
??8811557c9b1b Virtual Size: 702.3 MB
??52d8cf48f2f3 Virtual Size: 713.7 MB
??d2e740750084 Virtual Size: 713.7 MB
??1938691cd911 Virtual Size: 713.7 MB
??a8febaa9ed55 Virtual Size: 713.7 MB
??5eb0489aed66 Virtual Size: 713.8 MB
??1ed13b7f9eb1 Virtual Size: 713.8 MB
??f846774ccd37 Virtual Size: 713.8 MB Tags: tomcat7:latest

Deploy a Java application in Tomcat

The example above used a simple HTML file from Slashdot. Of course that’s not enough, we want to deploy Java applications! That can be done quite easily, just add the following line to the Dockerfile just below the ‘wget’ command for Slashdot.
RUN wget http://tomcat.apache.org/tomcat-7.0-doc/appdev/sample/sample.war -P /var/lib/tomcat7/webapps
Build a Docker container based on the new Dockerfile and run the container. Browsing to http://localhost:8080/sample/ will show the sample Tomcat web application.

Some useful Docker commands

Although Docker basics are fairly simple it still has a lot of options and useful commands.
Testing a bit with Docker will result in quite some containers. Stopping and starting them one by one is not really convenient. The following commands can be used to stop and remove all containers
docker stop $(docker ps -a -q)
docker rm $(docker ps -a -q)
Sometimes you create a container using a Dockerfile but then you realize the container is not working properly. With the command below you can login to the container and see what is going wrong.

docker run -i -t tomcat7 /bin/bash

Monday, 1 May 2017

Docker Architecture

Docker follows client-server architecture. Its architecture consists mainly three parts.
1) Client: Docker provides Command Line Interface (CLI) tools to client to interact with Docker daemon. Client can build, run and stop application. Client can also interact to Docker_Host remotely.
2) Docker_Host: It contains Containers, Images, and Docker daemon. It provides complete environment to execute and run your application.
3) Registry: It is global repository of images. You can access and use these images to run your application in Docker environment.
Docker Architecture

The Docker daemon

It is a process which is used to listen for Docker API requests. It also manages Docker objects like: images, container, network etc. A daemon can also communicate with other daemons to manage Docker services.

The Docker client

The Docker client is the primary way that many Docker users interact with Docker. When we use commands such as docker run, the client sends these commands to docker d, which carries them out. The docker command uses the Docker API.

Docker Registries

Docker registry is used to store Docker images. Docker provides the Docker Hub and the Docker Cloud which are public registries that anyone can use. Docker is configured to look for images on Docker Hub by default.
When we use the docker pull or docker run commands, the required images are pulled from your configured registry. When you use the docker push command, your image is pushed to your configured registry.

User Interface(UI) for Docker, Portainer

Portainer gives you access to a central overview of your Docker host or Swarm cluster. From the dashboard, you can easily access any manag...