Portainer gives you access to a central overview of your Docker host or Swarm cluster. From the dashboard, you can easily access any manageable entity.
CONTAINERS
CONTAINER LIST
The containers section provides a view of all available containers. You can see details about the containers (state, image, exposed ports...), filter or sort the containers and manage them using standard actions (start, run, remove...).
CONTAINER DETAILS
You can access a lot more information in the container details section and trigger common operations, access the stats and logs sections, start an exec instance to open a console in your container or even commit a container to create an image.
CONTAINER STATS
Portainer allows you to view container stats in realtime: CPU and memory usage, networking and processes running in the container.
CONTAINER LOGS
Easily investigate the behaviour of your container by inspecting its logs.
CONTAINER CONSOLE
Portainer allows you to start an exec instance which allows you to open a console in your container directly in your browser.
CONTAINER CREATION
Access the container creation form, which allows you to simply create your containers. It also gives you access to advanced container creation options.
IMAGES
IMAGE LIST
The images section provides a view of all available images. You can easily pull new image from the Docker hub or a private registry and easily manage all your images.
IMAGE DETAILS
Access a lot more information in the image details section from the size of the image to the related Dockerfile information. You can also manage image tags and push it to any registry (either Docker hub or any private registry).
NETWORKS
NETWORK LIST
The networks section provides a view of all available networks. Easily manage your networks from a centralized view or quickly create new networks.
VOLUMES
VOLUME LIST
As for the networks, you can easily manage the available volumes from this section and create more volumes.
CONTAINER TEMPLATES
Portainer allows you to quickly deploy container from our curated template list. Deploying a httpd web server or a MySQL database is just 2 clicks away !
CLUSTER OVERVIEW
When using Portainer with Docker Swarm or Swarm Mode, this section gives your more details on each node in your cluster.
SERVICES MANAGEMENT
Using the swarm mode? Use Portainer to manage your services and easily scale them.
ENDPOINT MANAGEMENT
Portainer allows you to manage to multiple Docker environments from a single instance.
USER MANAGEMENT AND USER ACCESS CONTROL
Portainer adds a security layer on top of Docker with authentication, multiple user management and the ability to define restrict access to some resources.
Docker and AWS have teamed up to make it easier than ever to deploy an enterprise Containers as a Service (CaaS) Docker environment on Amazon's EC2 infrastructure. Running Docker Datacenter on AWS gives developers and IT operations a highly reliable, low-cost way to deploy production-ready workloads in a single click.
With AWS Quick Start reference deployments you can rapidly deploy Docker containers on the AWS cloud, adhering to Docker and AWS best practices. The Docker Datacenter Quick Start uses CloudFormation templates that are modular and customizable so you can layer additional functionality on top or modify them for your own Docker deployments.
To get started with Docker Datacenter on AWS, watch the video below.
Easily deploy by clicking “Launch Stack” and you’ll be directed to the AWS CloudFormation portal.
Confirm your AWS Region that you'd like to launch this stack in
Provide the required parameters
Confirm and Launch.
Once complete, click on outputs tab to see the URLs of UCP/DTR, default username, and password, and S3 bucket name.
Docker For AWS
An integrated, easy-to-deploy environment for building, assembling, and shipping applications on AWS, Docker for AWS is a native AWS application optimized to take optimal advantage of the underlying AWS IaaS services while giving you a modern Docker platform that you can use to deploy portable apps. Docker for AWS does not require any software installed.
You just need a browser and an AWS account, and can provision Docker in a few clicks. Docker for AWS installs a swarm of Docker Engines secured end to end with TLS by default, and is integrated with AWS Autoscaling, Elastic Load balancer and Elastic Block Store.
he ~3.5 Ways to Send Configuration to your Dockerized Apps
1. Baking the Configuration into the Container
Baking your application’s configuration into a Docker image is perhaps the easiest pattern to understand. Basically one can use commands within the “Dockerfile” to drop configuration files into the right places via the Dockerfile’s COPY directive, or modify those configuration files at image build time with “sed” or ”echo” via the RUN command.
If there’s a container available on the Docker Hub Registry that does everything you want save for one or two config settings, you could fork that “Dockerfile” on GitHub, make modifications to the “Dockerfile” in your GitHub fork to drop in whatever configuration changes you want, then add it as a new container on the Docker Hub Registry.
2a. Setting the Application Configuration Dynamically via Environment Variables
Basically, when you “docker run” you will pass in pre-defined environment variables like so: "docker run -e SETTING1=foo -e SETTING2=bar ... <image name>". From there, the container’s entry point (startup script) will look for those environment variables, and “sed” or “echo” them into whatever relevant config files the application uses before actually starting the app.
It’s worth mentioning that the container’s entry point script should contain reasonable defaults for each of those environment variables if the invoker does not pass those environment variables in, so that the container will always be able to start successfully.
Pros:
This approach makes your container more dynamic in terms of configuration.
Cons:
You are sacrificing dev/prod parity because now folks can configure the container to behave differently in dev & prod.
2b. Setting the Application Configuration Dynamically via Environment Variables
This is a similar idea to using environment variables to pass in configuration, but instead the container’s startup script will reach out to a key-value (KV) store on the network like Consul or etcd to get configuration parameters.
This makes it possible to do more complex configurations than is possible with simple environment variables, because the KV store can have a hierarchical structure of many levels. It’s worth noting that widely-used tooling exists for grabbing the values from the KV store substituting them into your config files. Tools like confd even allow for automatic app-reloading upon changes to the KV configuration. This allows you to make your app’s configuration truly dynamic!
3. Map the Config Files in Directly via Docker Volumes
Docker Volumes allow you to map any file/directory from the host OS into a container, like so: “docker run -v <source path>:<dest path> ...”
Therefore if the config file(s) for your containerized app happened to be available on the filesystem of the base OS, then you could map that config file (or dir) into the container. Ex:
“docker run -v /home/dan/my_statsd_config.conf:/etc/statsd.conf hopsoft/graphite-statsd”
Pros:
You don’t have to modify the container to get arbitrary configurations in.
Cons:
You lose dev/prod parity because now your app’s config can be anything
If you’re doing this in production, now you have to get that external config file onto the base OS for sharing into the container (a configuration management tool like Ansible, Chef, or Puppet comes in handy here)
As per the official documentation, there are 2 ways in which you can manage data in Docker:
Data volumes
Data volume containers
Let us work through examples for both the above cases.
Few points to keep in mind about Data Volumes
A data volume is a specially designed directory in the container.
It is initialized when the container is created. By default, it is not deleted when the container is stopped. It is not even garbage collected when there is no container referencing the volume.
The data volumes are independently updated. Data volumes can be shared across containers too. They could be mounted in read-only mode too.
Mounting a Data volume
Let us begin first with the most basic operation i.e. mounting a data volume in one of our containers. We will be working with the busybox image to keep things simple.
We are going to use the -v [/VolumeName] as an option to mount a volume for our container. Let us launch a container as given below:
docker@boot2docker:~$ docker run -it -v /data --name container1 busybox
This will launch a container (named container1) in interactive mode and you will be at the prompt in the container.
Give the ls command as shown below:
docker@boot2docker:~$ docker run -it -v /data --name container1 busybox
/ # ls
bin dev home lib64 media opt root sbin tmp var
data etc lib linuxrc mnt proc run sys usr
/ #
Notice that a volume named data is visible now.
Let us a do a cd inside the data volume and create a file named file1.txt as shown below:
/ # cd data
/data # touch file1.txt
/data # ls
file1.txt
/data #
So what we have done so far is to mount a volume /data in the container. We navigated to that directory (/data) and then created a file in it.
Now, let us exit the container by typing exit and going back to the boot2docker prompt.
/data # exit
docker@boot2docker:~$
Now, if we do a docker ps -a , we should see our container (container1) currently in the exited state as shown below:
CONTAINER ID IMAGE COMMAND CREATED STATUS PORTS NAMES
22ab6644ea6b busybox "/bin/sh" 3 minutes ago Exited (0) 23 seconds ago container1
Now, let us inspect the container and see what Docker did when we started this container.
Give the following command:
docker@boot2docker:~$ docker inspect container1
This will give out a JSON output and you should look for Volumes attribute in the output. A sample output from my machine is shown below:
This tells you that when you mounted a volume (/data), it has created a folder /mnt/sda/…. for you, which is where it puts all the files, etc that you would have created in that volume. Note that we had created a file1.txt over there (we will come to that in a while).
Also notice that the VolumesRW mode is set to true i.e. Read and Write.
Since we are currently in the boot2docker host, we can check the contents of the folder by giving the command (Note that you will have to paste what you see on your machine)
docker@boot2docker:~$ sudo ls /mnt/sda1/var/lib/docker/volumes/af0e7c1547fbcb42e8d5a514252e47cb754c8adf701e21b13b67a
640d7a77883/_data
file1.txt
docker@boot2docker:~$
You will see that it shows our file1.txt that we created.
Now that the container is stopped i.e. exited, let us restart the container (container1) and see if our volume is still available and that file1.txt exists.
This shows to you that though you have removed the container1, the data volume is still present on the host. This is a dangling or ghost volume and could remain there on your machine consuming space. Do remember to clean up if you want. Alternatively, there is also a -v option while removing the container as shown in the help:
-f, --force=false Force the removal of a running container (uses SIGKILL)
 --help=false Print usage
 -l, --link=false Remove the specified link
 -v, --volumes=false Remove the volumes associated with the container
This will always remove your volumes when the container is also removed.
Exercise: What happens if you launch another container with the same /data volume. Is the file still there or does each container get its own file system? Try it out.
Mounting a Host Directory as a Data volume
Now that we have seen how to mount a volume in the container, the next step is to look at the same process of mounting a volume but this time we will mount an existing host folder in the Docker container. This is an interesting concept and is very useful if you are looking to do some development where you regularly modify a file in a folder outside and expect the container to take note or even sharing the volumes across different containers.
Since we have been using boot2docker for our examples so far, it is important to understand what the host means over here. In fact, the host over here is the boot2docker VM and not your laptop or machine. However, since boot2docker is a Linux VM running in VirtualBox, we do have the luxury of having some folders from our machine being available and mapped as host folders.
To understand that, do the following :
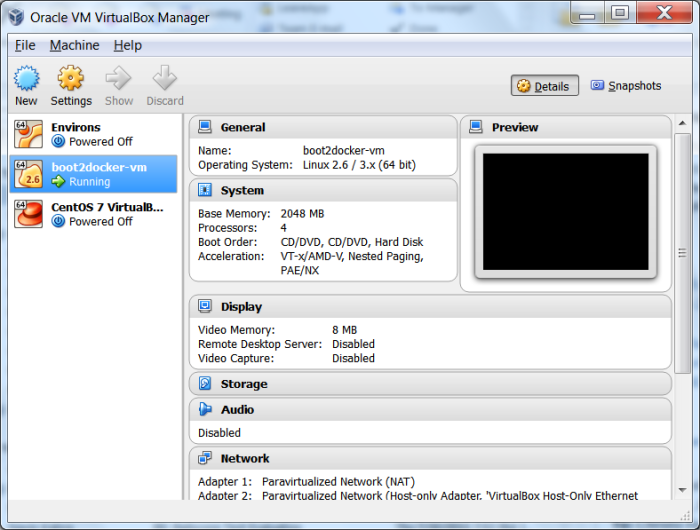
Launch Oracle VM VirtualBox on your machine.
You will be able to see the boot2docker-vm in VirtualBox as shown below:
Right click on the boot2docker-vm and click on Settings. This will bring up the Settings dialog and you can click on Shared Folders. You will notice that C:\Users folder has been shared as C/Users in your host i.e. boot2docker. You can map additional folders if you want but we will go with this example.
To mount a host volume while launching a Docker container, we have to use the following format for volume -v :
-v HostFolder:ContainerVolumeName
So, let us start a busybox container as shown below:
What we have done here is that we have mapped the host folder /c/Users to a volume /datavol that will be mounted inside our container (container1).
Now, if we do a ls , we can see that the /datavol has been mounted. Do a cd into that folder and a ls, and you should be able to see the folder contents of C:\Users on your machine.
/ # cd datavol
/datavol # ls
All Users Default Default User Public admin desktop.ini hello.txt irani_r
/datavol #
Hope this makes it clear on how to use host folders.
Exercise:
Try adding a file directly from your laptop/machine in C:\Users folder and then go back to your running container and do a ls there. You should be able to see that new file there.
From the container shell, go to the /datavol folder and then add a file there. Then go back to your machine/laptop and do a dir. You should see the new files there.
Note: that the above instructions are for Windows users. If you are doing this on a Linux box, you can directly map your host folders (full path) to the container data volume.
Additional Note: Optionally if you require, you can mount a single host file too as a data volume.
Start thinking now of how you would use host folders that have been mounted as data volumes. Assume you are doing development and have the Apache Web Server or any other Web Server running in the container. You could have started the container and mounted a host director that the Web Server can use. Now on your host machine, you could make changes using your tools and those would then get reflected directly into your Docker container.
Data volume containers
We now come to the next part i.e. creating a Data volume container. This is very useful if you want to share data between containers or you want to use the data from non-persistent containers. The process is really two step:
You first create a Data volume container
Create another container and mount the volume from the container created in Step 1.
Let us see that in action:
We will first create a container (container1) and mount a volume inside of that:
docker@boot2docker:~$ docker run -it -v /data --name container1 busybox
Now, let us go into the /data volume and create two dummy files in it as shown below:
/ # cd data
/data # ls
/data # touch file1.txt
/data # touch file2.txt
/data #
Now press Ctrl-P-Q to come back to the boot2docker prompt without exiting the container.
Now, if we do a docker ps, we should see our running container:
docker@boot2docker:~$ docker ps
CONTAINER ID IMAGE COMMAND CREATED STATUS PORTS
006f7ba16783 busybox "/bin/sh" 27 seconds ago Up 26 seconds
Now, if we execute a command on the running container1 i.e. see the contents of our /data volume, you can see that the two files are present.
docker@boot2docker:~$  docker exec container1 ls /data
file1.txt
file2.txt
Great ! Now, let us launch another container (container2) but it will mount the data volume from container1 as given below:
docker@boot2docker:~$ docker run -it --volumes-from container1 --name container2 busybox
Notice above that we have launched it in interactive mode and have used a new parameters — volumes-from <containername> that we have specified. This tells container2 to mount the volumes that container1 mounted.
Now, if we do a ls, we can see that the data folder is present and if we do a ls inside of that, we can see our two files: file1.txt and file2.txt
/ # ls
bin dev home lib64 media opt root sbin tmp var
data etc lib linuxrc mnt proc run sys usr
/ # cd data
/data # ls
file1.txt file2.txt
/data #
You can launch multiple containers too , all using the same data volume from container1. For e.g.
docker@boot2docker:~$ docker run -it --volumes-from container1 --name container3 busybox
docker@boot2docker:~$ docker run -it --volumes-from container1 --name container4 busybox